
As I want my steampunk gauge to look well used I'm going to need to make a new texture, and I'm going to make it by building up layers on top of layers.
When you create a new fill layer in SP, you can turn on/ off the separate maps that you made during the baking process. This allows you to work with them individually to build up a brand new, unique texture. This is what we're going to do to get our steampunk brass.

This is the model I started with after adding the dial texture. The first thing I'm going to do is make sure I have the body of the gauge selected and delete the default layer.
Now I'm all blank and ready I'm going to add a fill texture and turn all the maps off with the exception of colour and roughness like this;
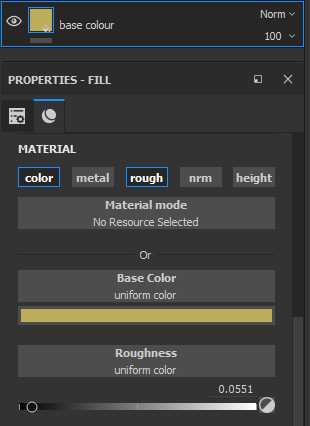
For brass, I have a certain colour I like to use as my base. I set the colour up and then rename the fill layer to base colour as above.
This is my roughness controller. Later on, you will see how I can control all my other layers just from this single slider.
Above this, I'm going to add another fill layer, this time I'm going to also add a black mask and then by clicking on the black mask I'm going to add yet another fill layer.
This is going to be my height controller for spotting, something that happens to brass as it ages.
In the first layer, turn off all the maps with the exception of height. I've also renamed the layer stack so I know what it is later.

In my secondary fill layer I'm going to set the projection to tri-planer from the dropdown menu, and where it says "Grayscale", I'm going to click and type "Spots", then find suitable grunge that fits the bill.

Playing with the balance settings I can get the markings I like.

To see these markings you're going to have to play with the height setting in our first fill layer in this texture stack.

What I have now is my height and colour information in two separate layers. We now need a third layer to add dirt and scratches to my brass.
Add another layer and rename it; Dirt and Scratches Rough. Turn all the maps off apart from colour and roughness and add a black mask.
As we did for the previous texture/ effect stack, we should add another fill layer on the black mask. This will contain our scratches.
Just like the last stack, we need to add the scratches grunge to the Greyscale section of this layer, like so;

Once we have this information we're going to need to add another item to this effects stack for the actual dirt and I'm going to use a generator.

This is where we can tweak the sliders to get more, less, or bigger dirt particles.

This still looks a little dull, but we haven't finished with our layers yet. This is what I have thus far;

Let's add one final layer on top and rename it to "Shiny". Turn off all the maps with the exception of metal and whack the slider up to 1.

This is a reasonable brass material. I could (should) add yet another layer in there for edge wear and even more dirt types. Try playing with the sliders/ colours and you will be surprised at how many different textures you can produce.
[I added an edge wearing generator to my final "Steampunk Brass" material]
One final thing I want to do is save the material as a smart material so that I can use it for other projects. To do this I simply add a Folder to my layer stack and drag all the layers into it.

Right-click on the folder icon and "Create Smart Material" from the menu.

Your newly created texture will now appear in your smart materials menu for use in any other future project.


No comments:
Post a Comment