Importing Files
Substance Painter has made it really easy to import and use new textures, and there are several ways to do it.
Direct Placement
You can place textures (and other things) directly into the Substance Painters shelf directory. This can be found easily by right-clicking the SP shortcut and selecting "Open File Location".
Once the window has opened you can scroll to find; Resources/Shelf/Allergorithmic/*****
Then place your new texture/ material/ smart material/ alpha etc in the appropriate folder. This will make your new file(s) available for all projects now, and in the future.
Import menu
If you find it more convenient to do things in-program then you can simply import your new file via the import menu;
Open up your shelf tab and click the Import resources icon.
Click the "Add resources" tab and navigate to the file you want to import.
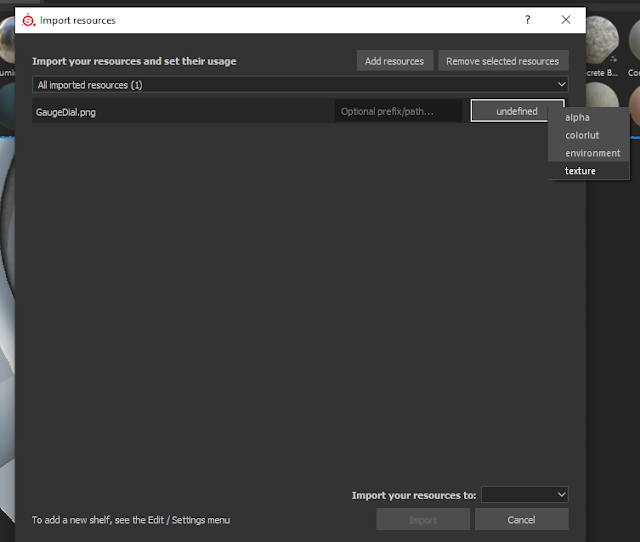
Once imported you will need to define it so that SP knows where to put it as above. In the Optional prefix/ path... box you can add keywords (you don't have to and I usually ignore this).
We're not quite done yet, we now need to tell SP when we want to use this resource and there are three options.
I still haven't figured out the difference between the current session and the project options, but I'm sure there is one. The most important option here I think is the "shelf" option. This will keep your newly imported file for any future projects you may need it for. Select the one that's appropriate to you, and then import.
Your new texture will now appear on the shelf to be used in your projects. Feel free to share this page/ blog on social media by clicking the links below. Thanks for reading.
Back to Substance Painter main page.


No comments:
Post a Comment